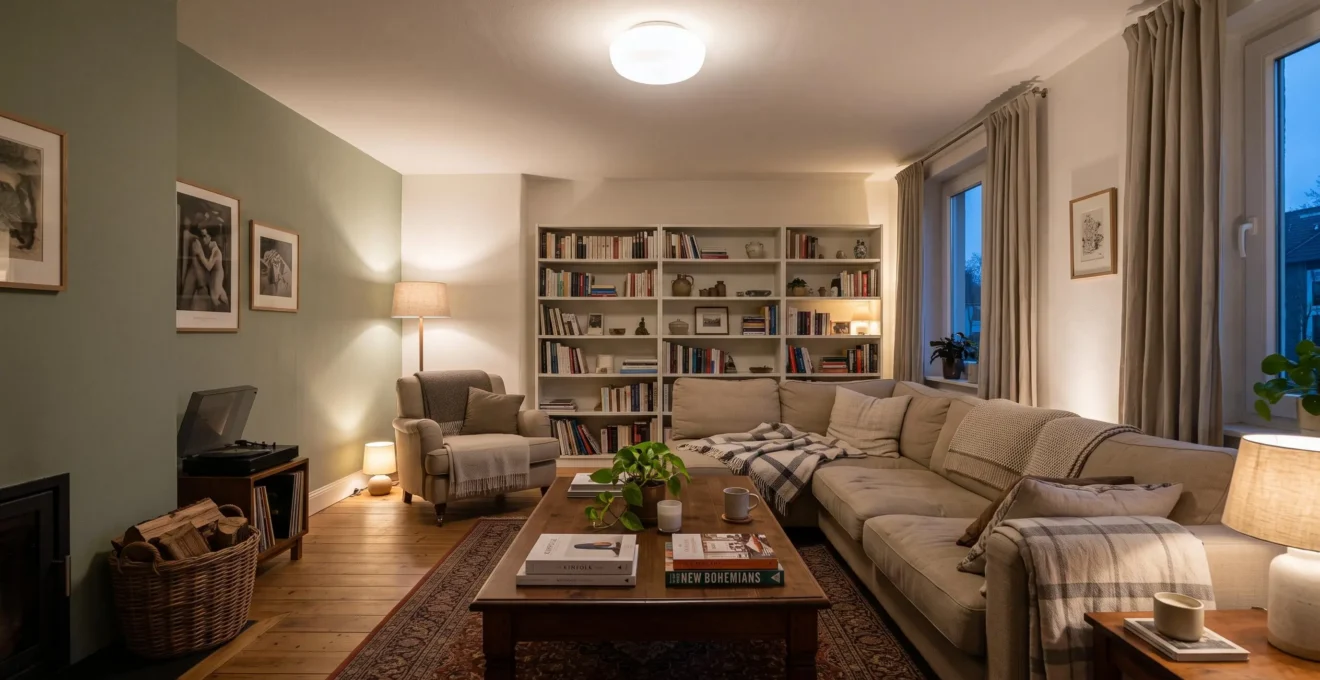
A ceiling light can make the centre of a room brilliantly bright while leaving the sofa, walls and corners surprisingly gloomy. Increasing its output rarely solves the underlying problem. It may simply produce stronger glare and a sharper contrast between illuminated and shadowed areas.
Comfortable ambient ceiling lighting works differently. It spreads useful light across the space, brings surrounding surfaces into view and allows brightness to change with the activity and time of day. A well-diffused ceiling fixture, carefully positioned downlights or an indirect lighting arrangement can all achieve this effect when their distribution suits the room.
The aim is not perfect uniformity or maximum brightness. It is a comfortable balance between the background illumination, the surfaces people see and the additional light needed for specific activities. Ceiling height, wall finishes, fixture design and dimming controls all influence that balance.
Before replacing a fitting or adding another bulb, examine where the existing light travels and how the room feels from the places where people actually sit, read and relax.
How to achieve softer, more balanced ceiling lighting
- Distribute illumination across walls and occupied areas instead of concentrating it directly beneath one powerful ceiling fixture.
- Choose diffused, glare-controlled fittings and adjustable brightness rather than relying on higher light output.
- Combine ceiling illumination with carefully positioned lamps, keeping each lighting layer independently controllable.
- Why Can Bright Ceiling Lighting Still Make a Room Feel Unevenly Lit?
- How Can You Position Ceiling Lights for More Even Ambient Illumination?
- Recessed or Pendant Lighting: Which Creates Better General Illumination?
- When Does Ambient Ceiling Lighting Become Too Bright for a Comfortable Room?
- When Should You Add Lamps to a Room With Existing Ceiling Lighting?
- How Can You Layer Ceiling, Table and Floor Lights Without Overlighting a Room?
- How Can You Set Different Light Levels for Dining, Reading and Relaxing?
- How Can You Position Task Lamps for Comfortable Reading or Desk Work?
Why Can Bright Ceiling Lighting Still Make a Room Feel Unevenly Lit?
Bright ceiling lighting can feel uneven because a large amount of light is concentrated in one area while surrounding walls and corners remain comparatively dark. The eye responds to these differences in brightness, not simply to the total light output. A powerful overhead fixture can therefore make a room feel both glaring and insufficiently illuminated.
Consider a living room with a single central downlight or a ceiling fixture that sends most of its light towards the floor. The coffee table may be strongly illuminated, but the walls behind the sofa receive much less light. Looking from the bright centre towards those darker surfaces makes the contrast particularly noticeable.
This distinction is central to Christopher Cuttle’s Lighting Design Objectives research, published by the Illuminating Engineering Society. The proposed framework distinguishes direct illumination of selected surfaces from ambient illumination contributed by light emerging from room surfaces. It offers a way to understand perceived room brightness beyond light reaching a horizontal surface, although it is not a mandatory residential design standard.
Room finishes also affect the result. Pale walls and ceilings generally return more light into the space than dark, low-reflectance finishes. Matte surfaces tend to scatter reflections, while glossy furniture, polished floors and screens may produce concentrated reflections that make a bright source more distracting.
Ceiling height changes the relationship between fixtures and occupied surfaces. A concentrated beam in a low-ceilinged room can create a pronounced bright area, while a similar fitting at greater height may illuminate a broader area with less light reaching the surfaces below. Its beam angle and output matter alongside mounting height.
It also helps to separate brightness for a task from brightness for visual comfort. A strong pool of light can be helpful on a work surface without making the entire room pleasant. Wattage describes electrical power consumption, not how comfortably light is distributed.
Replacing an existing bulb with a brighter one can intensify the original bright patch and make the contrast more noticeable. The better first question is which surfaces are missing light, rather than how much additional output the ceiling fixture can provide.
Once those causes are visible, fixture placement becomes a more useful design decision than increasing brightness indiscriminately.
How Can You Position Ceiling Lights for More Even Ambient Illumination?
Position ceiling lights according to the room’s dimensions, furniture layout and the surfaces that need illumination, rather than following a universal spacing formula. Aim for overlapping areas of comfortable light, avoid concentrated glare and consider how walls receive illumination. The best arrangement balances usable brightness across the room without requiring every corner to look identical.
Start by drawing a simple room plan showing walls, major furniture and circulation routes. Mark the seating positions and the areas that currently feel dim. These observations provide a more useful starting point than automatically placing a fixture at the geometric centre.
For multiple recessed lights, examine the proposed beam distribution and mounting height. Wider beams can overlap to produce a more continuous background, while tightly focused beams may leave distinct bright and dark patches. The appropriate distance between fittings therefore depends on the particular luminaire, room dimensions and desired effect.
Distance from the walls matters as well. A fixture aimed towards a nearby wall may brighten that vertical surface effectively, but a narrow beam directed primarily at the perimeter can leave central areas comparatively subdued. Conversely, fittings concentrated in the middle may fail to illuminate the room’s edges.
Wall-washing provides another way to improve perceived brightness. Adjustable ceiling fittings can direct light towards walls, curtains or shelving, allowing reflected illumination to contribute to the background. Indirect uplighting can also brighten a ceiling and soften the impression of a single concentrated source.
Before changing the installation, inspect the room at night with the existing lights in their usual operating state. Look for persistent shadowed areas, uncomfortable reflections and places where a light source is directly visible from a seat.
This observation can reveal whether a fitting needs repositioning, whether an adjustable gimbal would improve the direction of light or whether a supplementary lamp would be more practical. If rewiring is undesirable, directional adjustment and suitable dim-to-warm products can offer useful changes without relocating the ceiling point.
Five checks before changing your ceiling lighting
- Draw the room and mark existing fixtures, seating and main activity areas. Keep the annotated layout as your reference plan.
- Inspect the room after dark and mark at least the areas that appear noticeably darker or overly bright. Produce a simple shadow map.
- Sit in the main viewing positions and record direct glare or distracting reflections. Create a short glare checklist.
- Review each fixture’s available beam and adjustment options, noting what can be redirected or dimmed. Make a fixture-by-fixture adjustment list.
- Test a revised arrangement using available controls or temporary lamps, then compare the result from the same positions. Record which changes improve comfort before planning permanent work.
Any permanent alteration to ceiling wiring, fixture locations or electrical circuits should be assessed and carried out in accordance with applicable local electrical requirements by a suitably qualified professional.
Once the areas requiring illumination are clear, it becomes easier to decide which fixture type can deliver the intended spread of light.
Recessed or Pendant Lighting: Which Creates Better General Illumination?
Neither recessed nor pendant lighting is automatically better for general illumination. Recessed fittings can provide discreet, distributed background light when their beams overlap appropriately, while pendants can illuminate a wider area when their shades diffuse or transmit light. The better option depends on ceiling height, fixture optics, glare control and whether the room needs uniform background lighting or a defined illuminated zone.
A recessed downlight typically directs much of its output below the ceiling plane. This makes it useful for circulation routes, kitchens and rooms where visual simplicity is important. However, several narrow-beam fittings can produce separate pools of light and multiple visible glare points, particularly from certain seating positions.
A pendant behaves differently depending on its shade. A translucent diffuser may send light sideways and downwards, helping illuminate the surrounding room. An opaque metal shade can concentrate light beneath it, creating a useful pool over a table but providing less light to the walls.
Ceiling height adds another consideration. In a relatively low room, recessed or flush-mounted fixtures preserve overhead clearance and sightlines. A taller room may accommodate a pendant comfortably, allowing it to bring a light source closer to the area where illumination is needed.
The comparison is therefore about light distribution and visual comfort, not simply decorative style.
| Decision factor | Recessed lighting | Pendant lighting |
|---|---|---|
| Typical distribution | Usually directional; depends on beam optics and diffuser | Can be broad or concentrated depending on shade design |
| Low ceilings | Preserves headroom and visual clearance | Requires careful consideration of suspension height |
| Potential glare | Multiple visible sources may cause discomfort | An exposed bulb or poorly shielded diffuser can cause glare |
| Installation considerations | Multiple positions may require additional ceiling work | Can sometimes use an existing ceiling connection |
| Best-fitting purpose | Distributed background illumination | Broad ambient spread or a defined illuminated area |
Installation requirements also differ. Multiple recessed fittings may involve more ceiling openings, wiring and positioning work. A pendant connected to an existing suitable point may involve fewer changes, although its support, electrical connection and clearance still require proper assessment. Neither arrangement has a universally lower installation cost.
The most useful selection criterion is how the particular product distributes light. A wide-beam recessed fixture with effective glare control may provide very comfortable general illumination. A well-diffused pendant may be equally suitable, whereas an opaque pendant shade can leave the outer room comparatively dark.
Whichever fixture type suits the room, its full output should not be treated as the ideal brightness for every activity.
When Does Ambient Ceiling Lighting Become Too Bright for a Comfortable Room?
Ambient ceiling lighting becomes too bright when it creates uncomfortable glare, distracting reflections or excessive brightness for the activity taking place. Warning signs include washed-out visual detail, a clinical atmosphere and a strong light source dominating the room. Comfort depends on distribution, viewing position and time of day, so no single lumen figure defines overlighting for every home.
A room that feels pleasantly bright during household tasks may feel overstimulating during a quiet evening. The lighting has not necessarily become technically excessive; the required visual environment has changed.
Look for practical signs of discomfort. A ceiling fitting reflected in a television screen, a bright source visible while reclining on the sofa or glossy surfaces producing distracting highlights can all indicate that the light needs to be redirected, softened or reduced.
Before removing fixtures, try adjusting their output. Dimming gives one lighting arrangement more flexibility across changing activities. It is especially useful where ceiling lighting provides background illumination while lamps handle local tasks.
The U.S. Department of Energy light-bulb purchasing guidance explains the importance of checking whether LED lamps support dimming and whether they are compatible with the selected control system. A dimmable label alone does not guarantee satisfactory behaviour with every existing dimmer.
Check the relevant lamp, driver and dimmer specifications before installation. Incompatible combinations may have a limited dimming range, operate inconsistently or flicker, although these behaviours are not inevitable for every incompatible product.
Independent control is particularly valuable when several layers of light are installed. Ceiling downlights, pendants and supplementary lamps do not all need to run at maximum output simultaneously. Separate switching groups or suitable smart lighting controls allow the illuminated environment to change without physically removing light sources.
Brightness and colour appearance also interact. The Department of Energy describes 2700 K as a typical warm appearance associated with residential settings and 3000 K as another warm option. These are useful starting points, not universal comfort requirements. Personal preference, materials and the room’s purpose should guide the final choice.
Where the ceiling source still dominates at a comfortable output, introducing light from other positions can reduce the visual contrast without requiring stronger overhead illumination.
When Should You Add Lamps to a Room With Existing Ceiling Lighting?
Add table or floor lamps when ceiling lighting leaves persistent dark areas, concentrates brightness in the middle of the room or fails to illuminate activities near seating. Lamps introduce light closer to the surfaces people use and see, making the environment feel more balanced. They work best as complements to adjustable ceiling lighting, rather than extra sources left running at full brightness.
A central ceiling fixture may illuminate a coffee table well while leaving the armchairs and surrounding walls in relative shadow. Placing a floor lamp near the seating area can bring light into that part of the room without increasing the intensity directly beneath the ceiling fixture.
The benefit comes partly from changing what is illuminated. A shaded table lamp can brighten nearby furniture and a portion of the wall, adding visible detail away from the ceiling. This reduces the dominance of one bright overhead area and can create a softer impression across the space.
Consider three common situations:
- Dark perimeter: A lamp near a corner or side wall can extend illumination beyond the ceiling fixture’s main beam.
- Uncomfortable central brightness: Lowering the ceiling output and introducing a shaded lamp near seating can redistribute the apparent brightness.
- Activities away from the centre: A local reading or conversation lamp can serve those areas without increasing general illumination everywhere.
Placement is more important than simply adding more fixtures. Position lamps at the edges of the occupied space and near their intended uses. Clustering them directly beneath the ceiling light duplicates illumination where it is already strongest.
A documented example of combining general and local lighting
An IES illustrated project on layered architectural lighting describes an enclosed workplace equipped with glare-controlled pendants, directional track downlights and individual task lights.
The project also directs illumination towards vertical surfaces to support perceived brightness. It demonstrates the practical use of different light distributions and user-controlled task illumination, although its workplace setting does not establish a guaranteed outcome for residential rooms.
Remember that lamps can create their own problems when poorly coordinated. An exposed bright bulb near eye level may be more uncomfortable than the ceiling fitting it was meant to complement. Shades, source positioning, controllable output and compatible colour appearance matter.
The next challenge is ensuring every additional source contributes something distinct, rather than building a room filled with redundant light.
How Can You Layer Ceiling, Table and Floor Lights Without Overlighting a Room?
Layer ceiling, table and floor lighting by assigning each source a specific role and controlling its output independently. Ceiling fixtures provide general background illumination, task lamps brighten work areas and accent sources highlight selected surfaces or features. When these layers are balanced rather than operated at full power together, a room can feel comfortably illuminated without becoming excessively bright.
The most practical starting point is to decide what each fixture should accomplish. General lighting should make the room navigable and visually coherent. Task lighting should provide extra illumination exactly where an activity requires it. Accent lighting can add emphasis or depth without needing to illuminate the entire space.
Imagine a living room with a central ceiling fitting, a table lamp beside the sofa and a floor lamp near a bookcase. The ceiling light establishes the background. The table lamp supports reading or conversation near the sofa. The floor lamp brings light to a darker edge and may highlight nearby shelving.
The arrangement fails if every source is switched on at maximum brightness by default. Instead, begin with a moderate ceiling level and increase only the layer needed for the current activity.
One useful test is to examine the room after dark, switching on one layer at a time. Watch how each source changes the surfaces you can see. If a fixture adds little visible benefit in the situations for which it was intended, reconsider its position, output or purpose.
Colour-temperature coordination can make the layers feel more coherent. Warm and cool white sources may create an intentional contrast, but an accidental mixture can make one part of a room feel visually disconnected from another.
The technical categories in ENERGY STAR’s downlight product criteria describe 2700–3000 K as warmer white light and 4000 K or above as cooler white light. These categories help compare products but do not establish which colour temperature every homeowner should prefer. Coordinating compatible appearances across fixtures is generally more useful than matching their decorative styles exactly.
Finally, organise the controls around the ways the room is used. An evening setting might combine dimmed ceiling light with shaded lamps. A reading setting could raise one task lamp while keeping the background subdued. An entertaining setting may add gentle illumination across several seating areas.
With distinct roles established, the lighting can be organised into practical settings for everyday activities.
How Can You Set Different Light Levels for Dining, Reading and Relaxing?
Set different light levels by creating a lighting arrangement for each activity rather than relying on one fixed ceiling output. Dining benefits from comfortable illumination concentrated around the table, reading needs stronger local task light and relaxing generally suits a lower, softer background. Dimmers, separate switches and suitable smart lighting controls make these changes possible without repeatedly moving fixtures.
The appropriate setting depends on what people need to see and where they are positioned. A lighting arrangement that works for dinner may not provide sufficient light for detailed reading, while a reading arrangement can feel unnecessarily intense when everyone simply wants to relax.
The following profiles offer practical starting points rather than prescribed illumination measurements.
| Activity | Main lighting emphasis | Supporting illumination |
|---|---|---|
| Dining | Diffused or shaded light concentrated around the table | Moderate, warm background illumination around the room |
| Reading | Focused, adjustable light on the page or work surface | Lower ambient illumination that avoids an excessively dark surrounding area |
| Relaxing | Soft, lower-level general illumination | Indirect or shaded lamps that maintain comfortable visibility |
Dining presents a particular challenge because people face each other across a table. A pendant positioned too low, or one with an exposed bright bulb, can produce direct glare at seated eye level. Its suspension height must therefore account for the tabletop, the fitting’s dimensions, seating positions and sightlines. A shade or diffuser can help control the visible source.
Reading needs a different distribution. Rather than raising every ceiling light, illuminate the book directly with an adjustable lamp. Keep enough background light to avoid an uncomfortable jump between the task and its surroundings.
For relaxation, reduce the overhead output and favour shaded lamps or indirect illumination of walls and ceilings. The result should remain comfortable for moving through the space, without making every surface equally bright.
These settings can be created using conventional switches and dimmers, or with compatible smart bulbs and saved presets. Even a simple written list of which fixtures to turn on can establish useful routines. Avoid assuming every existing LED fitting supports smooth dimming or adjustable colour temperature.
One bright fixture on one fixed switch offers limited flexibility. Giving key sources separate controls makes a room more adaptable than relying on a single setting for every use.
The greatest improvement often comes from directing stronger light towards a specific task while allowing the surrounding illumination to remain comfortable.
Key takeaways before positioning a task lamp
- Identify the exact surface that needs additional light instead of brightening the entire room.
- Consider the user’s seated position and sightlines before choosing a lamp location.
- Preserve a comfortable relationship between focused task illumination and the surrounding ambient light.
How Can You Position Task Lamps for Comfortable Reading or Desk Work?
Position a task lamp beside the reading or working area, usually slightly above and to one side of the surface being illuminated. Direct its beam onto the book, paper or desk without placing the bright source in the user’s line of sight. The lamp should provide stronger local illumination than the surrounding room while avoiding shadows, reflections and direct glare.
For reading in an armchair, place the lamp beside the seat so its light reaches the open pages without being blocked by the reader’s head, shoulder or hands. A position slightly behind or above the reading area can work well, provided the light source remains shielded from direct view.
The best position depends on posture, the dimensions of the chair and the lamp’s beam. A tall floor lamp with a fixed shade may suit one seating arrangement but become awkward if the reader changes position. An adjustable arm makes it easier to redirect the beam towards the page.
For handwriting and other paper-based desk activities, a useful starting point is the side opposite the dominant writing hand. This can help prevent the hand and forearm from casting shadows across the work. The position should still be adjusted to suit the actual task and furniture arrangement.
Computer work calls for different attention. A lamp reflected directly in a monitor can be distracting even when it illuminates the desk effectively. Position the light beside the screen and direct it towards papers or other working materials, rather than pointing it at the display or placing an exposed source where it creates a troublesome reflection.
The essential principle is focused task illumination against a comfortable ambient background. The work area should be noticeably easier to see without requiring the whole room to match its brightness. Too little background illumination can also create an uncomfortable contrast, so avoid treating a bright desk lamp in an otherwise dark room as the only possible arrangement.
Adjustable-arm lamps are particularly flexible because their height, reach and direction can change as the user moves between a book, notebook and keyboard. A stable base, accessible switch and appropriate shade or shielding help make these adjustments practical.
After positioning the lamp, test it from the normal seated posture. Move the book or chair slightly, check for shadows and reflections, and confirm that the illuminated area remains useful without exposing the eyes to an uncomfortable bright source.
Start with one frequently used seat or desk, adjust its task lamp while keeping the ceiling light at a comfortable background level, and then assess the entire room from that position. This small test provides a practical foundation for improving the remaining lighting arrangement.
Can warm ceiling lighting still cause glare?
Yes. Warm colour temperature changes the appearance of white light but does not eliminate glare. A bright exposed bulb or concentrated beam can remain uncomfortable at 2700 K or 3000 K. Shielding, diffusion, fixture positioning and controllable output are all important.
Do you need to replace existing ceiling lights to create softer illumination?
Not necessarily. Depending on the installation, compatible dimming, adjustable beam direction, alternative diffusers or strategically positioned lamps may improve the room without replacing every ceiling fitting. Any electrical changes should follow local requirements and the equipment manufacturer’s instructions.
Are more ceiling lights always better than one central fixture?
No. Several well-positioned fixtures can distribute light more effectively, but additional sources can also introduce glare and unnecessary brightness. Beam angle, spacing, shielding and individual control matter more than fixture count alone.
Can dark walls work with comfortable ambient lighting?
Yes. Dark walls generally reflect less light than pale surfaces, so the same fitting may produce a different impression of brightness. A thoughtful combination of wall-directed light, indirect illumination and local lamps can improve visual balance without requiring every surface to become equally bright.
Should ambient ceiling lighting stay on when watching television?
A low level of indirect ambient lighting can be useful for comfortable visibility around the room, but ceiling fixtures that reflect in the screen or shine directly towards viewers may be distracting. Try reducing their output or using a shaded lamp outside the screen’s reflective sightlines.